

You’ve been putting off the switch for months. Your current budget app raised its price, broke its bank sync again, or just stopped fitting your life. The real hesitation isn’t about finding something new: it’s the fear of losing years of transaction history, carefully set goals, and the mental model you built around your money. The good news is that you can switch budgeting apps without losing the data that actually matters. Most of what feels irreplaceable turns out to be surprisingly portable, and the rest is less useful than you think. This guide walks you through a clean migration, from export to final cancellation, so you land in your new app with zero gaps in your financial picture.
What’s actually worth carrying over
The instinct is to save everything. Every coffee purchase from 2023, every split Uber ride, every miscategorized ATM withdrawal. But old transaction data rarely drives future decisions. What you need going forward fits on a single sheet of paper.
Here’s what genuinely matters for your next app:
- Current balances for each checking, savings, and credit card account
- Recurring bills with amounts, due dates, and frequencies (monthly, quarterly, annual)
- Active savings goals with target amounts and how much you’ve already saved
- Subscription list with renewal dates and costs
- Net worth snapshot from your most recent month-end
And here’s what feels important but isn’t:
| Data Type | Why You Think You Need It | Why You Don’t |
|---|---|---|
| Full transaction history | “I might need to look something up” | Your bank keeps 7+ years of statements for free |
| Old category totals | “I want to compare year over year” | A screenshot or PDF of your last 3 months covers this |
| Archived goals you already hit | “It shows my progress” | It’s a nice memory, not a planning tool |
| Custom category names | “I spent hours setting those up” | Most apps use similar defaults; rebuilding takes 5 minutes |
Your bank and credit card statements are the permanent record. They don’t disappear when you cancel an app. The app was always just a lens on top of that data. Keep your focus on the five items in the first list, and you’ll carry over everything that shapes your next paycheck.
Exporting balances, bills, and goals
Most budget apps offer some kind of export. The format and completeness vary widely, so check before your subscription lapses.
Finding Your Export Options
Open your current app’s settings and look for “Export,” “Download Data,” or “Account.” Common formats include CSV (spreadsheet-friendly), QFX/OFX (for importing into financial software), and PDF (read-only summaries). If the app offers CSV, grab that first. It’s the most flexible.
What to Export and Where to Save It
- Export your full transaction history as a CSV. You probably won’t import it, but it’s your safety net.
- Screenshot or export your recurring bills list. Capture the payee name, amount, due date, and whether it’s auto-pay.
- Write down each savings goal: the name, target amount, and current balance.
- Record your current account balances as of today’s date.
- Save your most recent net worth chart or number.
Drop all of these files into a single folder on your phone or computer. Name it something obvious like “Budget Migration – May 2026.” The whole process takes about 15 minutes.
If Your App Doesn’t Offer Export
Some apps make leaving harder than it should be. If there’s no export button, take screenshots of your bills list, goals screen, and account balances. For transaction history, remember: your bank has it all. Log into each bank’s website and download the last 3 months as CSV if you want a local copy.
A 2024 CFPB report on personal financial data rights noted that consumers should be able to access and transfer their financial data without unreasonable barriers. If your app locks you out of your own information, that’s a sign you picked the right time to leave.
Setting up the new app in one sitting
Don’t spread this across a week. Momentum matters. Block 30 minutes, open your migration folder, and get it done.
Enter Your Starting Balances First
Pull up your bank app and enter each account’s current balance into the new app. Use today’s real numbers, not the ones from your export file (those may already be stale). This is your clean starting point.
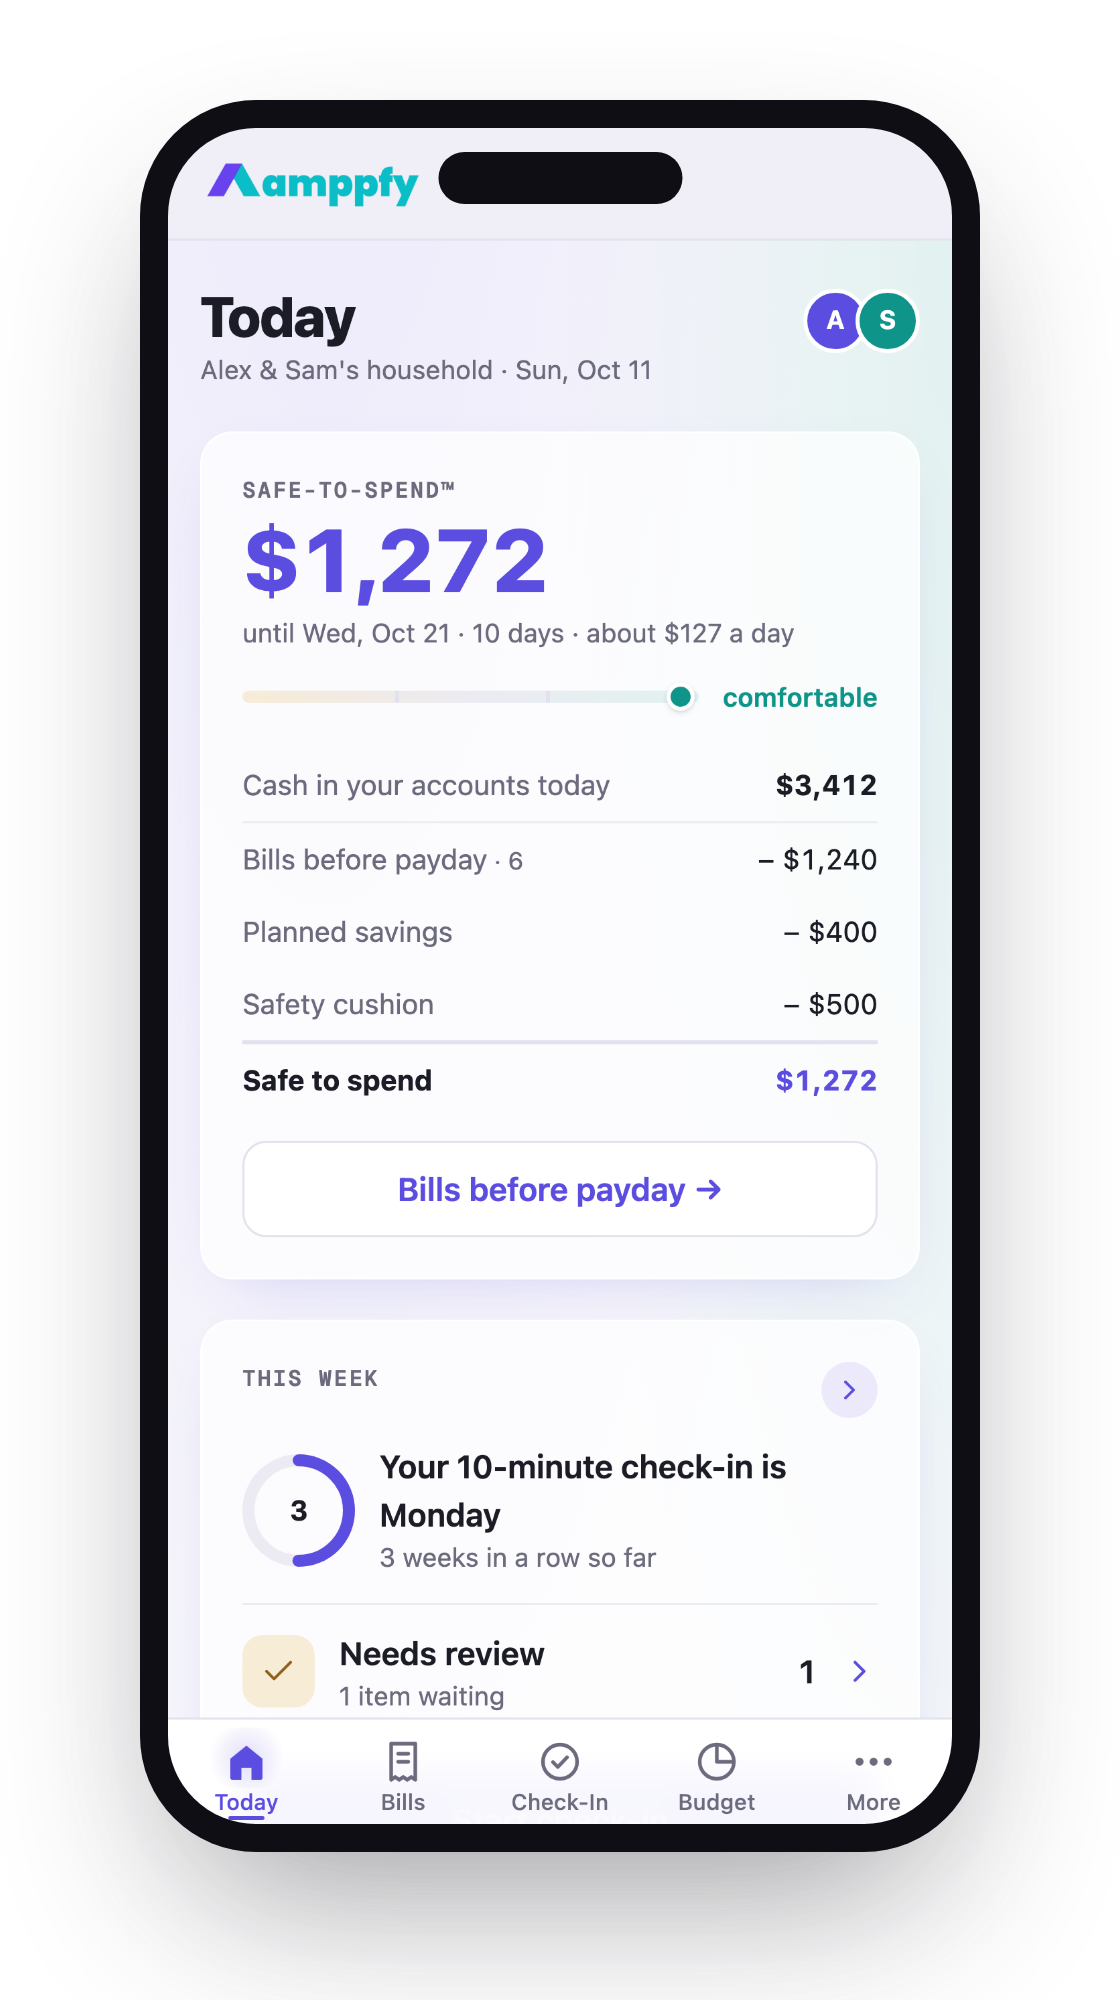
For an app like Amppfy, you’d type in each balance yourself: checking, savings, credit cards. No bank login required, and it takes about 30 seconds per account. Your Safe-to-Spend™ number builds from those balances automatically.
Add Bills and Subscriptions Next
Work through your exported bills list one by one. For each bill, enter:
- Payee name
- Amount (or estimated amount for variable bills like electric)
- Due date and frequency
- Whether it’s on auto-pay
Most apps let you set bills to recur automatically. Double-check annual bills like insurance premiums or domain renewals. These are the ones people forget and then get surprised by in November.
Set Up Goals Last
Re-create each active savings goal with its target and current balance. If you had $1,800 saved toward a $5,000 emergency fund, enter both numbers so the app shows accurate progress from day one.
Here’s a quick math check to confirm your setup is right: take your checking balance, subtract all bills due before your next payday, subtract your planned savings contribution, and subtract whatever cushion feels comfortable. For example: $3,412 cash − $1,240 bills − $400 savings − $500 cushion = $1,272 safe to spend. If your new app shows a number close to that, you’re set up correctly.
Running both for one pay period
This is the step most migration guides skip, and it’s the one that prevents regret. Keep both apps active for one full pay cycle: typically two weeks or one month.
Why the Overlap Matters
Your old app has institutional memory. It knows that your electric bill spikes in July, that your car insurance drafts on the 14th, and that your gym charges an annual fee in September. Your new app doesn’t know any of that yet. Running both apps in parallel lets you catch anything you forgot to transfer.
During this overlap period, update both apps at each paycheck or weekly check-in. Yes, it’s double the work for a couple of weeks. But it’s far less work than discovering a missed $300 insurance payment two months from now.
What to Watch For During the Overlap
| Check This | In the Old App | In the New App |
|---|---|---|
| Bills due this period | Do they all appear? | Did you enter every one? |
| Safe-to-spend number | What does it show? | Is the new app’s number close? |
| Savings contributions | Are they accounted for? | Did you set the right amounts? |
| Subscription charges | Any surprises this month? | Are renewal dates correct? |
If the two apps show meaningfully different “what’s left to spend” numbers, something got missed. Go line by line through your bills until you find the gap. It’s usually one forgotten subscription or a bill entered with the wrong date.
When to Trust the New App
After one complete pay cycle with no surprises, you’re ready. The new app has proven it can catch what the old one caught. Your confidence in it is earned, not assumed.
For couples, this overlap period is especially useful. Both partners can confirm the shared view looks right before you pull the plug on the old system. If you’re using Amppfy, each partner gets their own login and sees the same Safe-to-Spend number while keeping private balances separate.
Closing the old app and its subscription
Once your overlap period is clean, it’s time to cancel. Don’t just delete the app from your phone. That doesn’t stop the charges.
Cancellation Checklist
- Open the old app and look for a “Cancel Subscription” or “Manage Plan” option in settings.
- If you subscribed through Apple’s App Store, go to Settings > Apple ID > Subscriptions on your iPhone. Find the app and cancel there.
- If you paid through Google Play or directly on the app’s website, cancel through those platforms.
- Confirm you receive a cancellation email or see the end date displayed.
- Take a final export or screenshot of anything you haven’t already saved.
- Delete the app from your phone.
A common trap: some apps offer a “pause” instead of a cancel. Pausing often resumes billing automatically after 30 or 60 days. Choose the full cancellation option.
After You Cancel
Keep your migration folder for at least 90 days. If you realize in August that you forgot to note your renter’s insurance renewal date, you’ll want those screenshots. After a few months, the new app becomes your only app, and the old data fades into irrelevance.
Your weekly check-in with the new app should take about 10 minutes. Update your balances, confirm upcoming bills look right, and glance at your Safe-to-Spend number. That’s the whole routine. If it takes longer than that, the app is asking too much of you.
Frequently Asked Questions
Can I import CSV transaction history into a new budgeting app?
It depends on the app. YNAB and Quicken accept CSV imports with some formatting adjustments. Many newer apps, including Amppfy, focus on current balances and forward-looking bills rather than historical transactions. Since your bank stores all past transactions anyway, importing old data is usually unnecessary. Focus on getting your balances, bills, and goals set up correctly instead.
What if I lose data between canceling the old app and setting up the new one?
This is exactly why the overlap period exists. By running both apps for one pay cycle, you confirm everything transferred before you cancel anything. If you’ve already canceled, your bank statements and credit card portals still hold your complete transaction history. The only data unique to the old app is custom categories and goal names, which you can recreate in minutes.
How do I move budgeting data when switching from a couples app?
Both partners should export their own views before the switch. Decide together which bills, goals, and balances need to carry over to the shared setup. During the overlap period, have both partners verify the new app reflects reality. If your new app supports shared views, like a shared Safe-to-Spend number, test it with one real bill cycle before going all-in.
Is it worth switching if my current app still works but costs more?
Price hikes are one of the most common reasons people move to a new budget app. If your current app jumped from $5 to $15 per month, that’s $120 a year. A free alternative that handles your core needs (balances, bills, goals, a clear spending number) saves real money. The migration takes under an hour. You’ll recoup that time in savings within the first month.
Make the Switch This Weekend
Moving to a new budget app is a one-afternoon project, not a month-long ordeal. Export your bills and balances, set up the new app in a single sitting, run both through one pay period, then cancel the old subscription. The data that matters is smaller than you expected, and your bank keeps the rest.
If you’ve been putting off the switch because the process felt overwhelming, block 30 minutes this weekend and start with the export. Your future self, the one not paying $15 a month for broken bank sync, will appreciate it.