
Set up your household
After you sign up, on your iPhone or on the web, Amppfy walks you through six screens under one line: Let’s find your number. About five minutes. Nothing is saved until the last screen, and you can change anything later. On iPhone, amount fields bring up the decimal keypad.
The running receipt
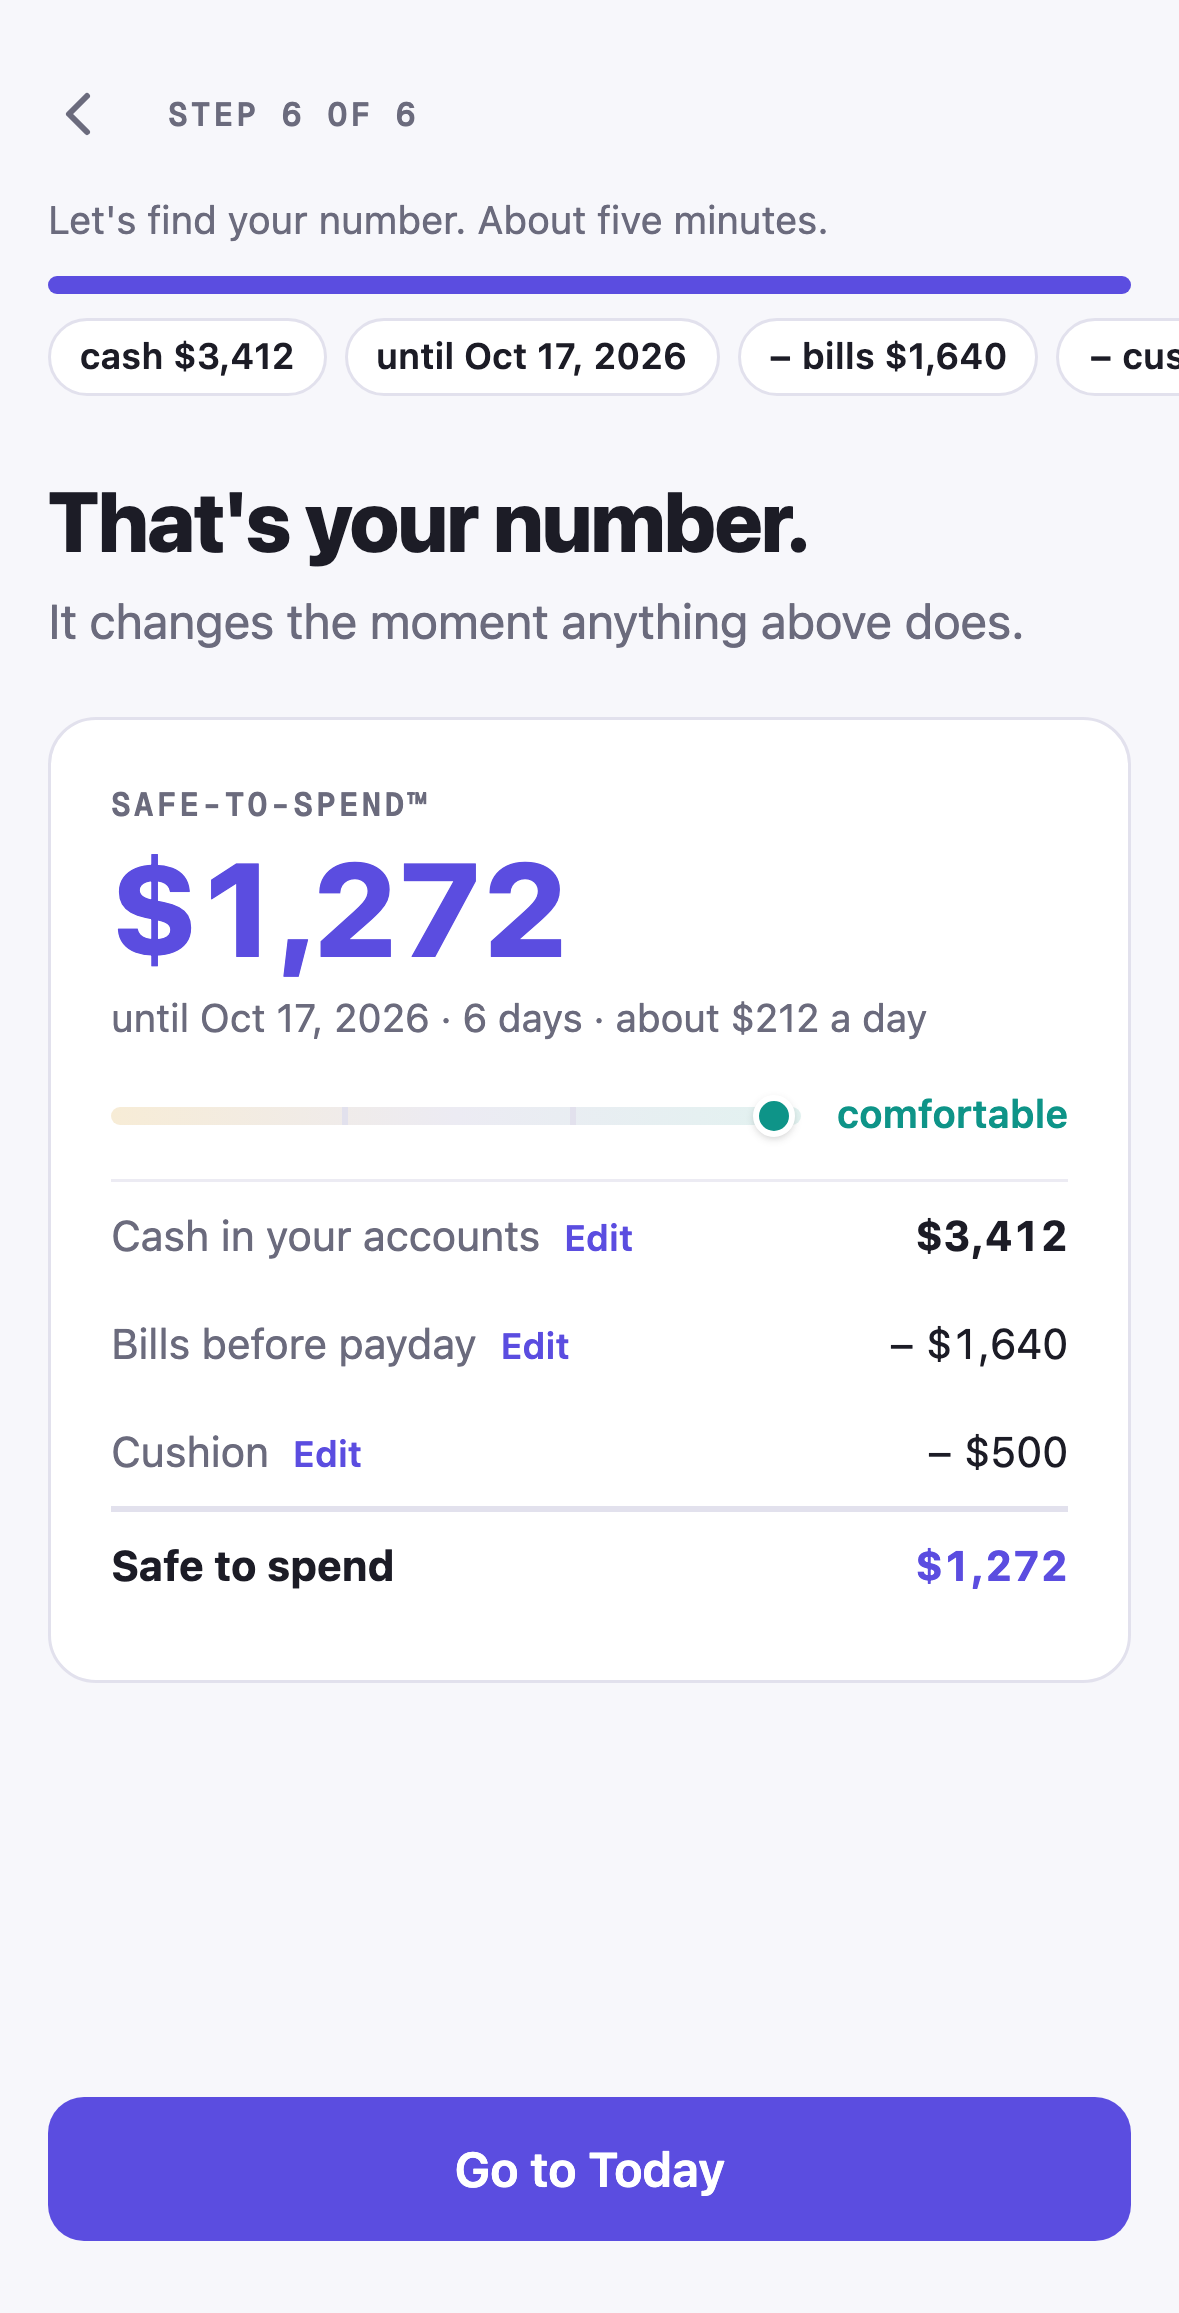
Section titled “The running receipt”Under the progress bar sits a strip of chips: cash, until payday, − bills, − cushion, safe to spend. Each one fills in with a real figure as you finish its step, so you watch the number take shape. Tap a filled chip to jump back to that step; Back never loses what you entered.
Continue stays greyed out until a step has what the number needs. There is no Skip, because a number built on a blank step would not be yours.
Step 1: Who is this for?
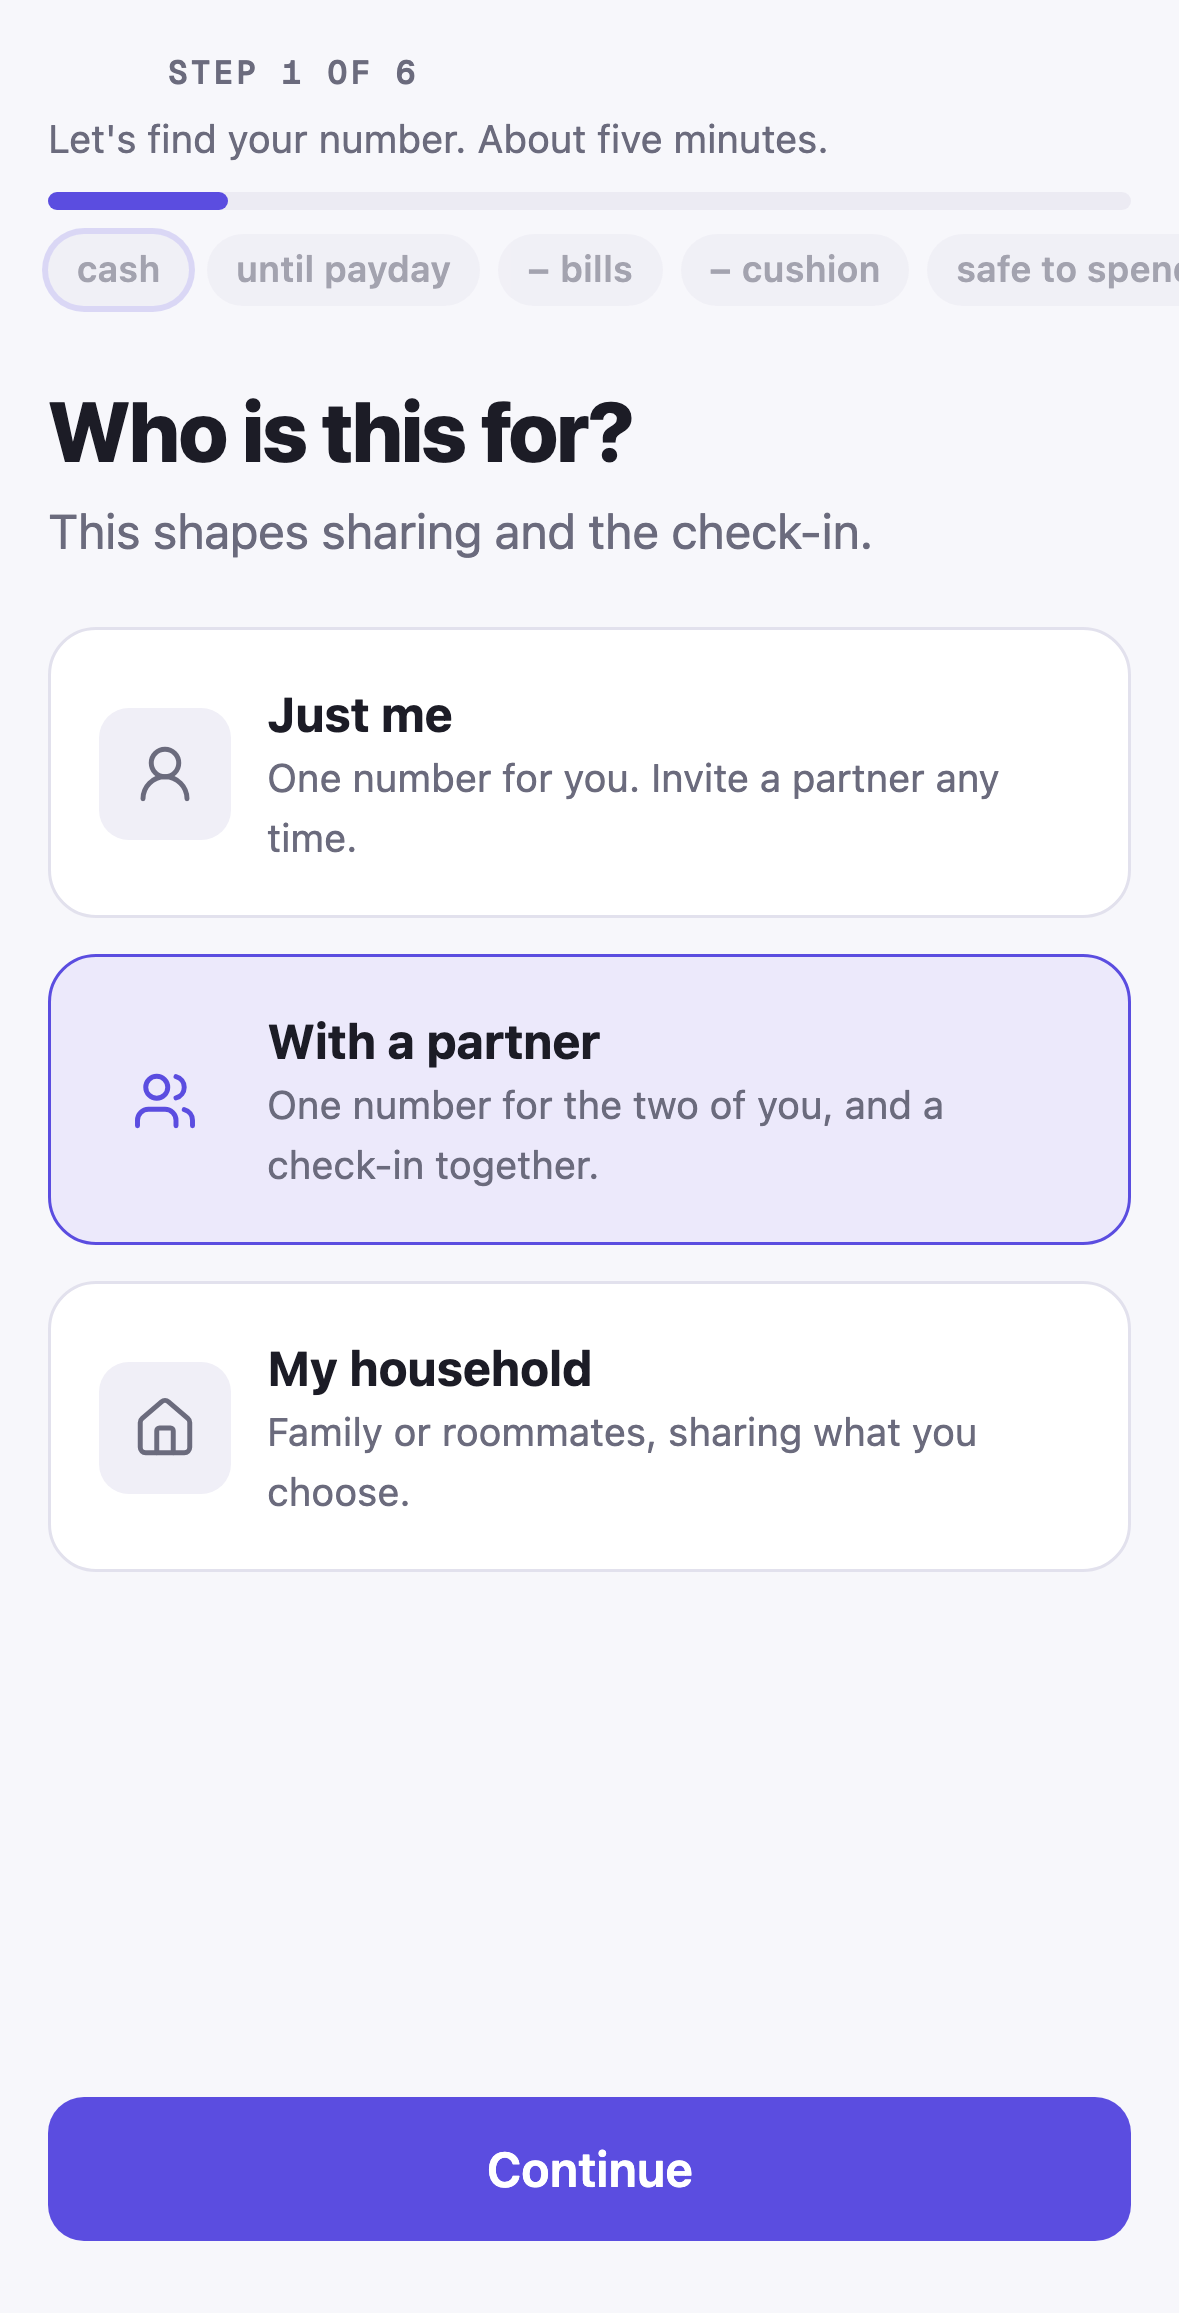
Section titled “Step 1: Who is this for?”Choose Just me, With a partner, or My household. This shapes sharing and the weekly check-in. Partners and households get an invite moment after the reveal; you can also invite a partner any time later.
Step 2: Your cash
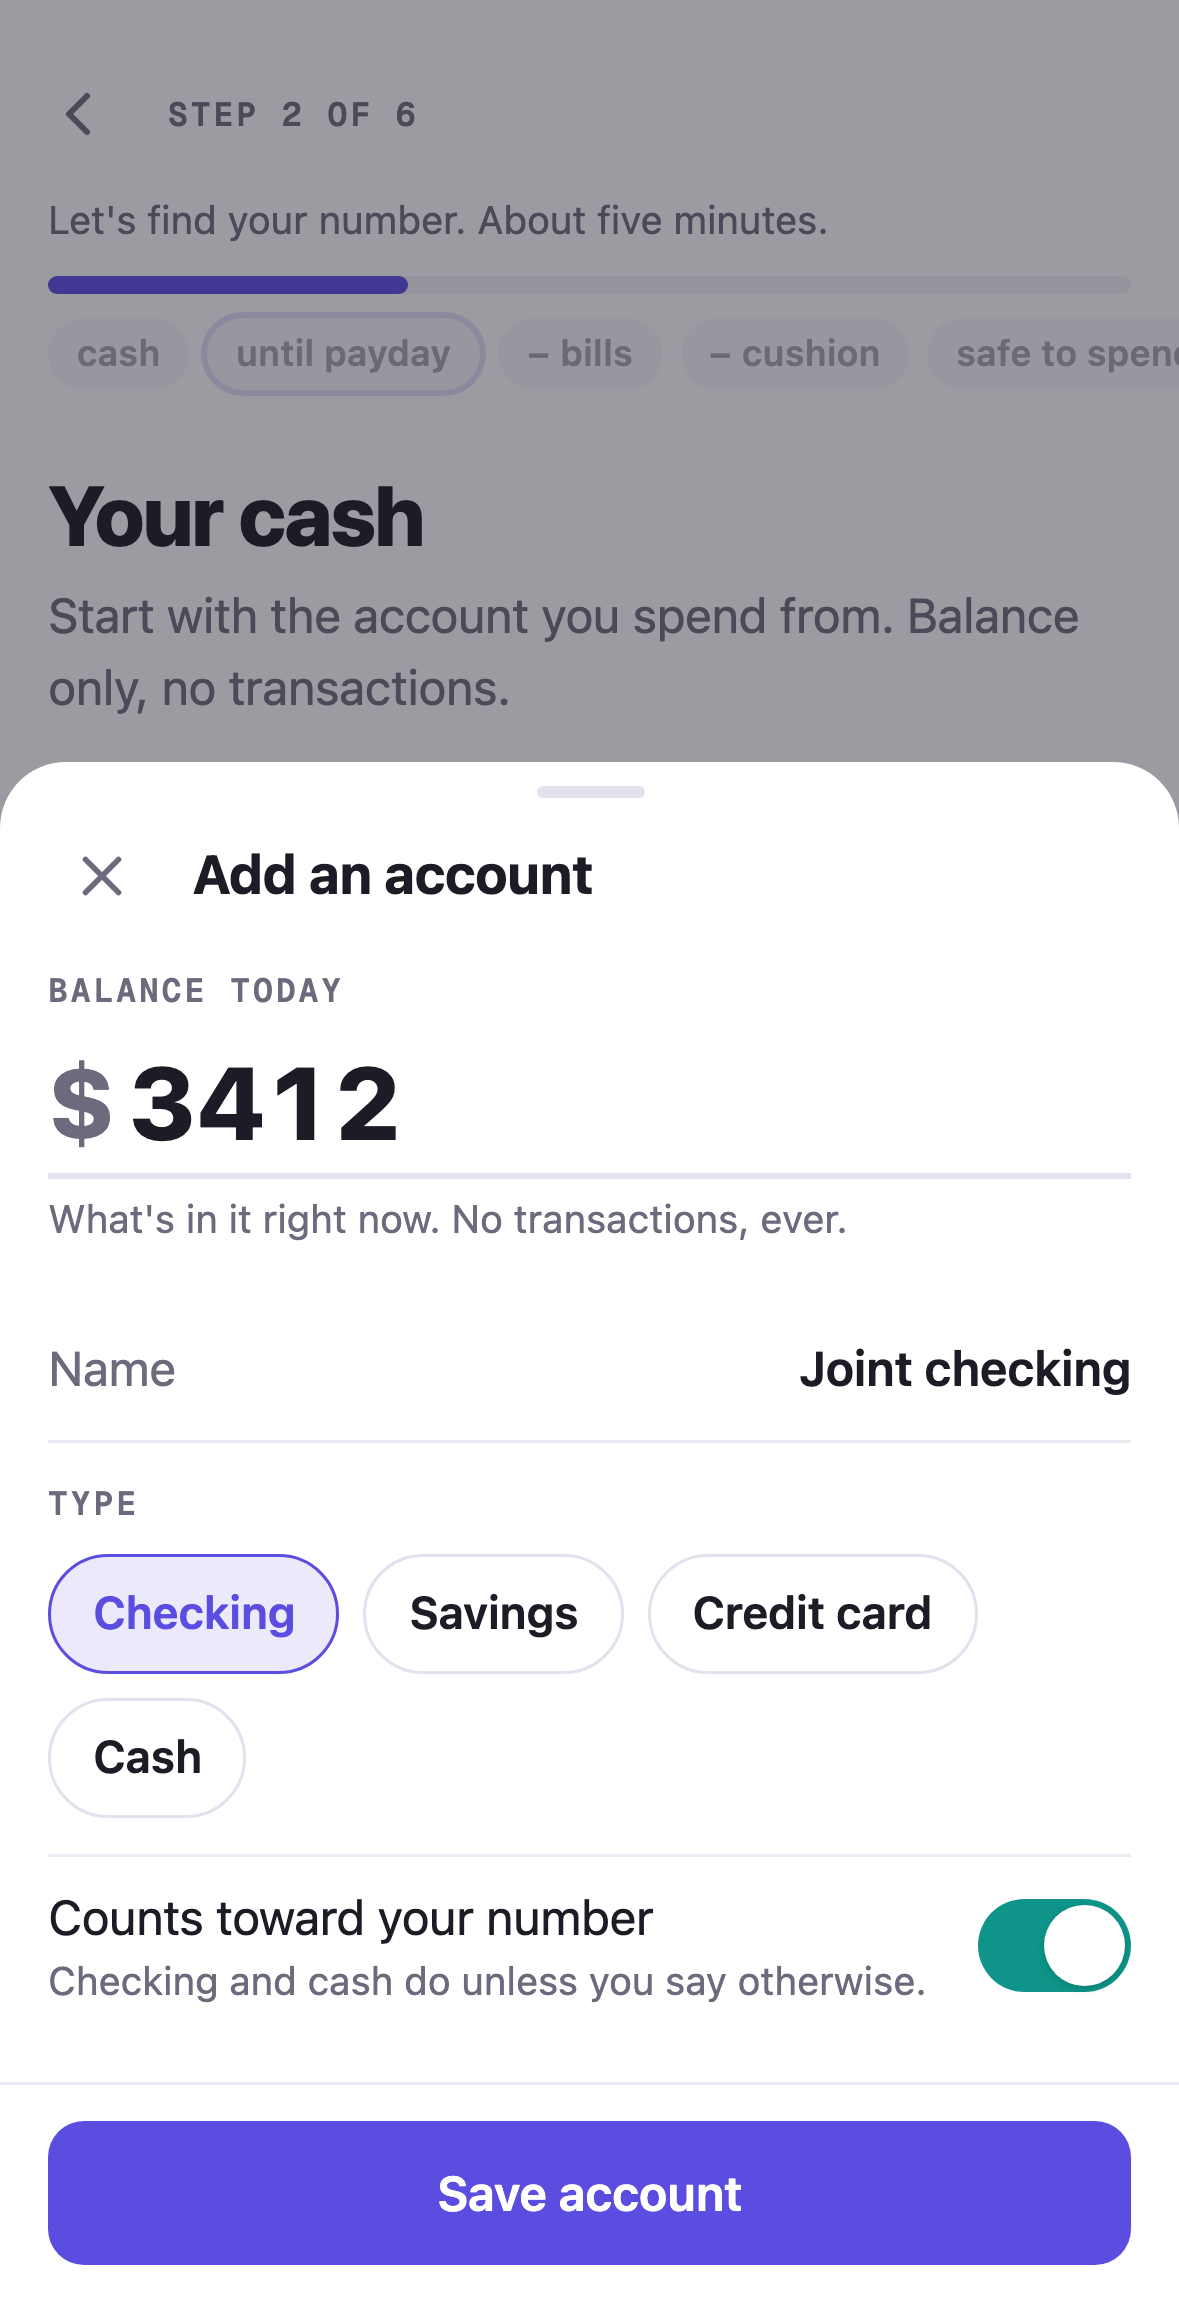
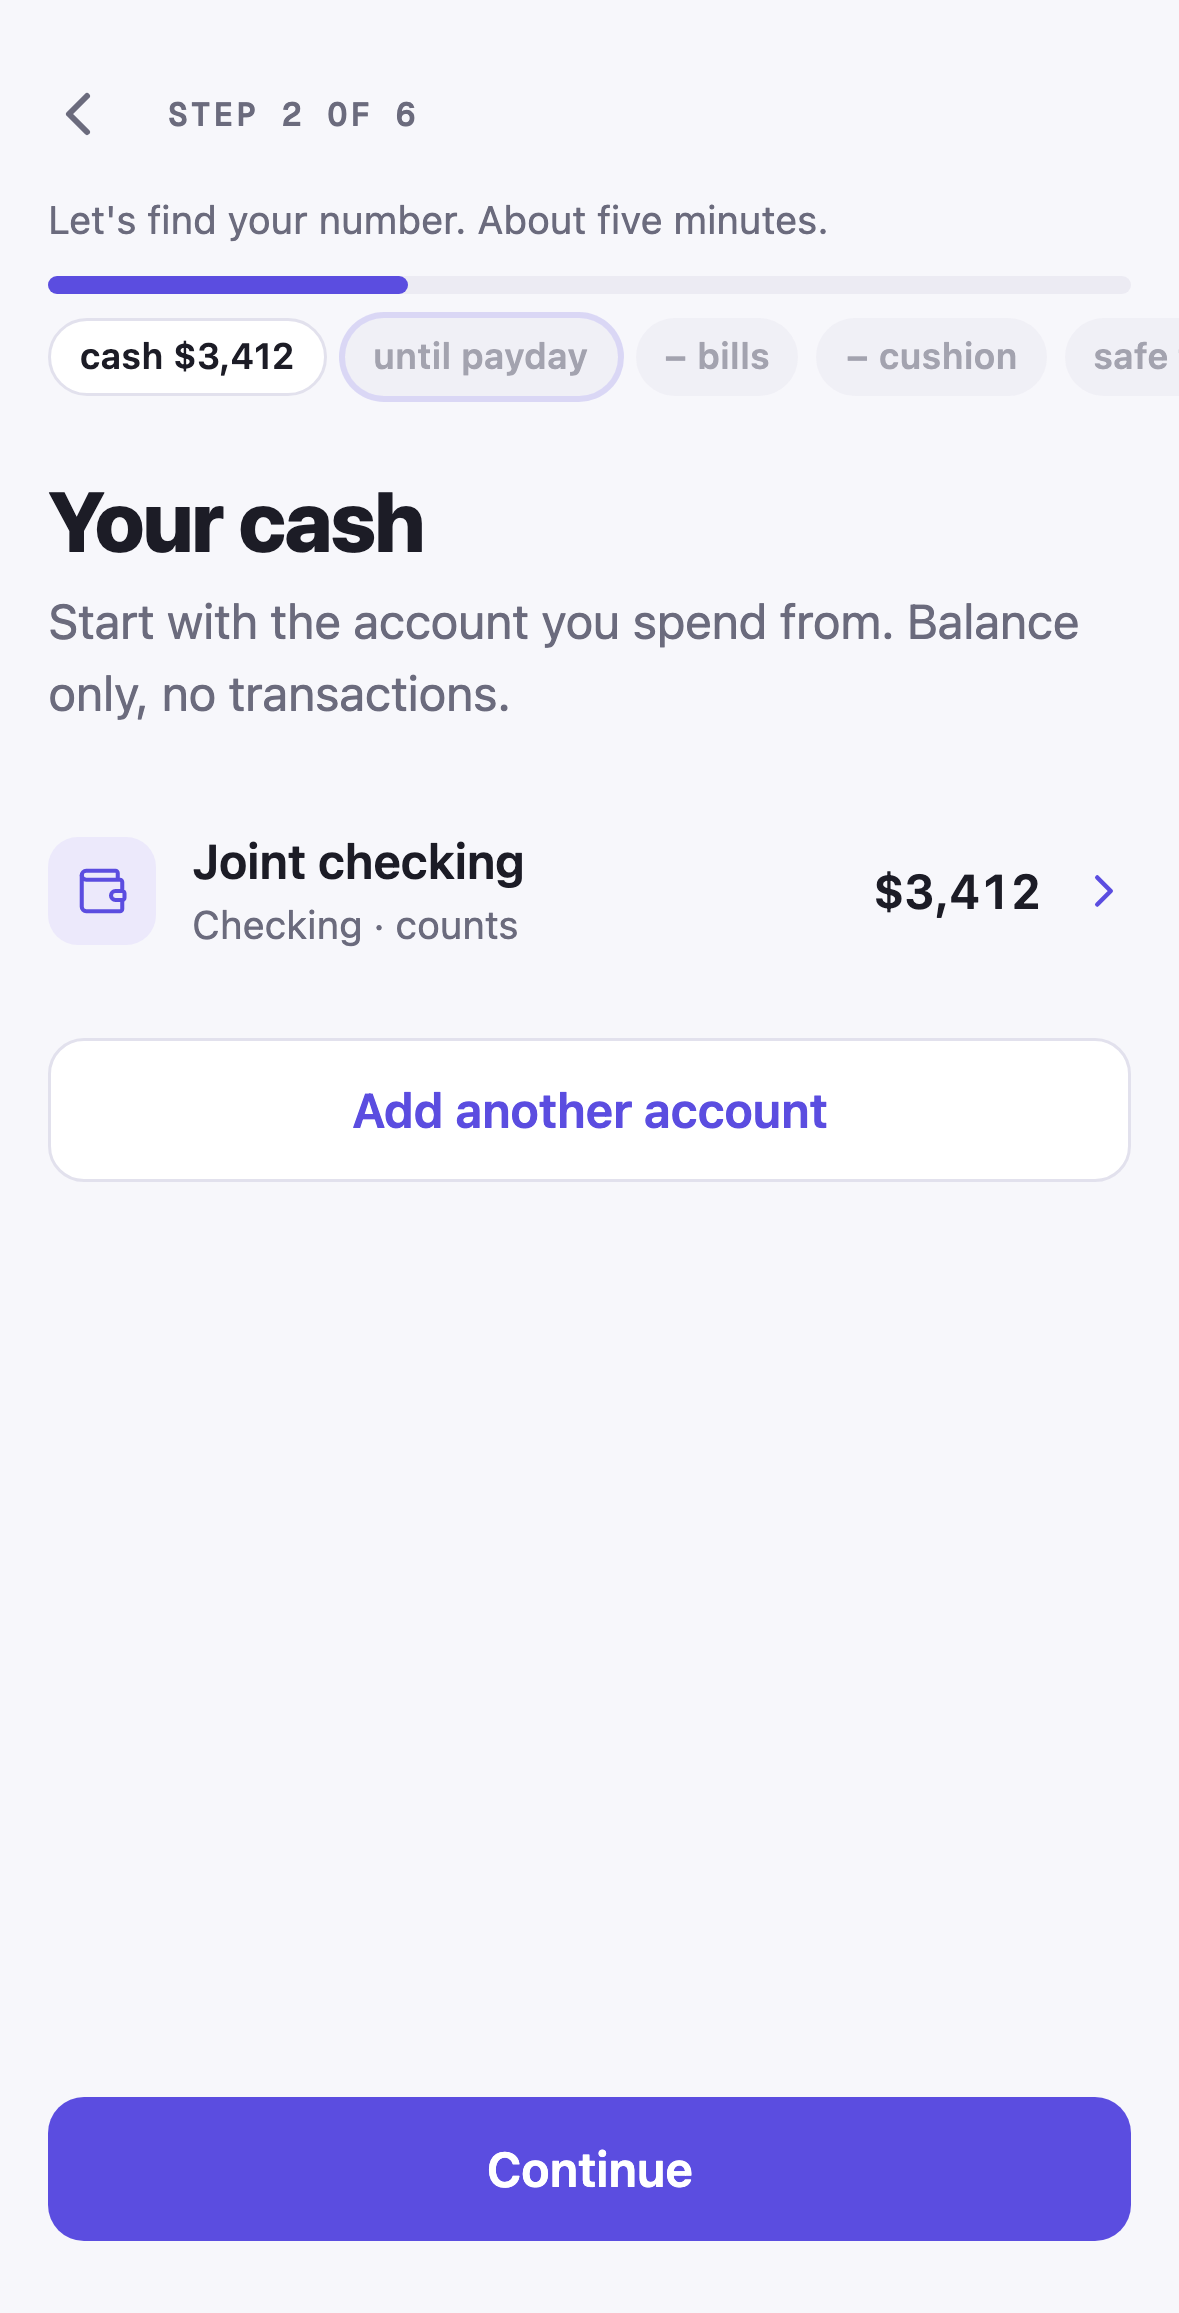
Section titled “Step 2: Your cash”Tap Add your checking account. A sheet asks for the balance today (the first and largest field), a name, and the type: Checking, Savings, Credit card, or Cash. Checking and cash count toward your number unless you switch that off; savings and credit cards never do. Add another account adds the next one, and each account becomes a row you can tap to correct.
Balances only, no transactions. You refresh them at the weekly check-in.
Step 3: Payday
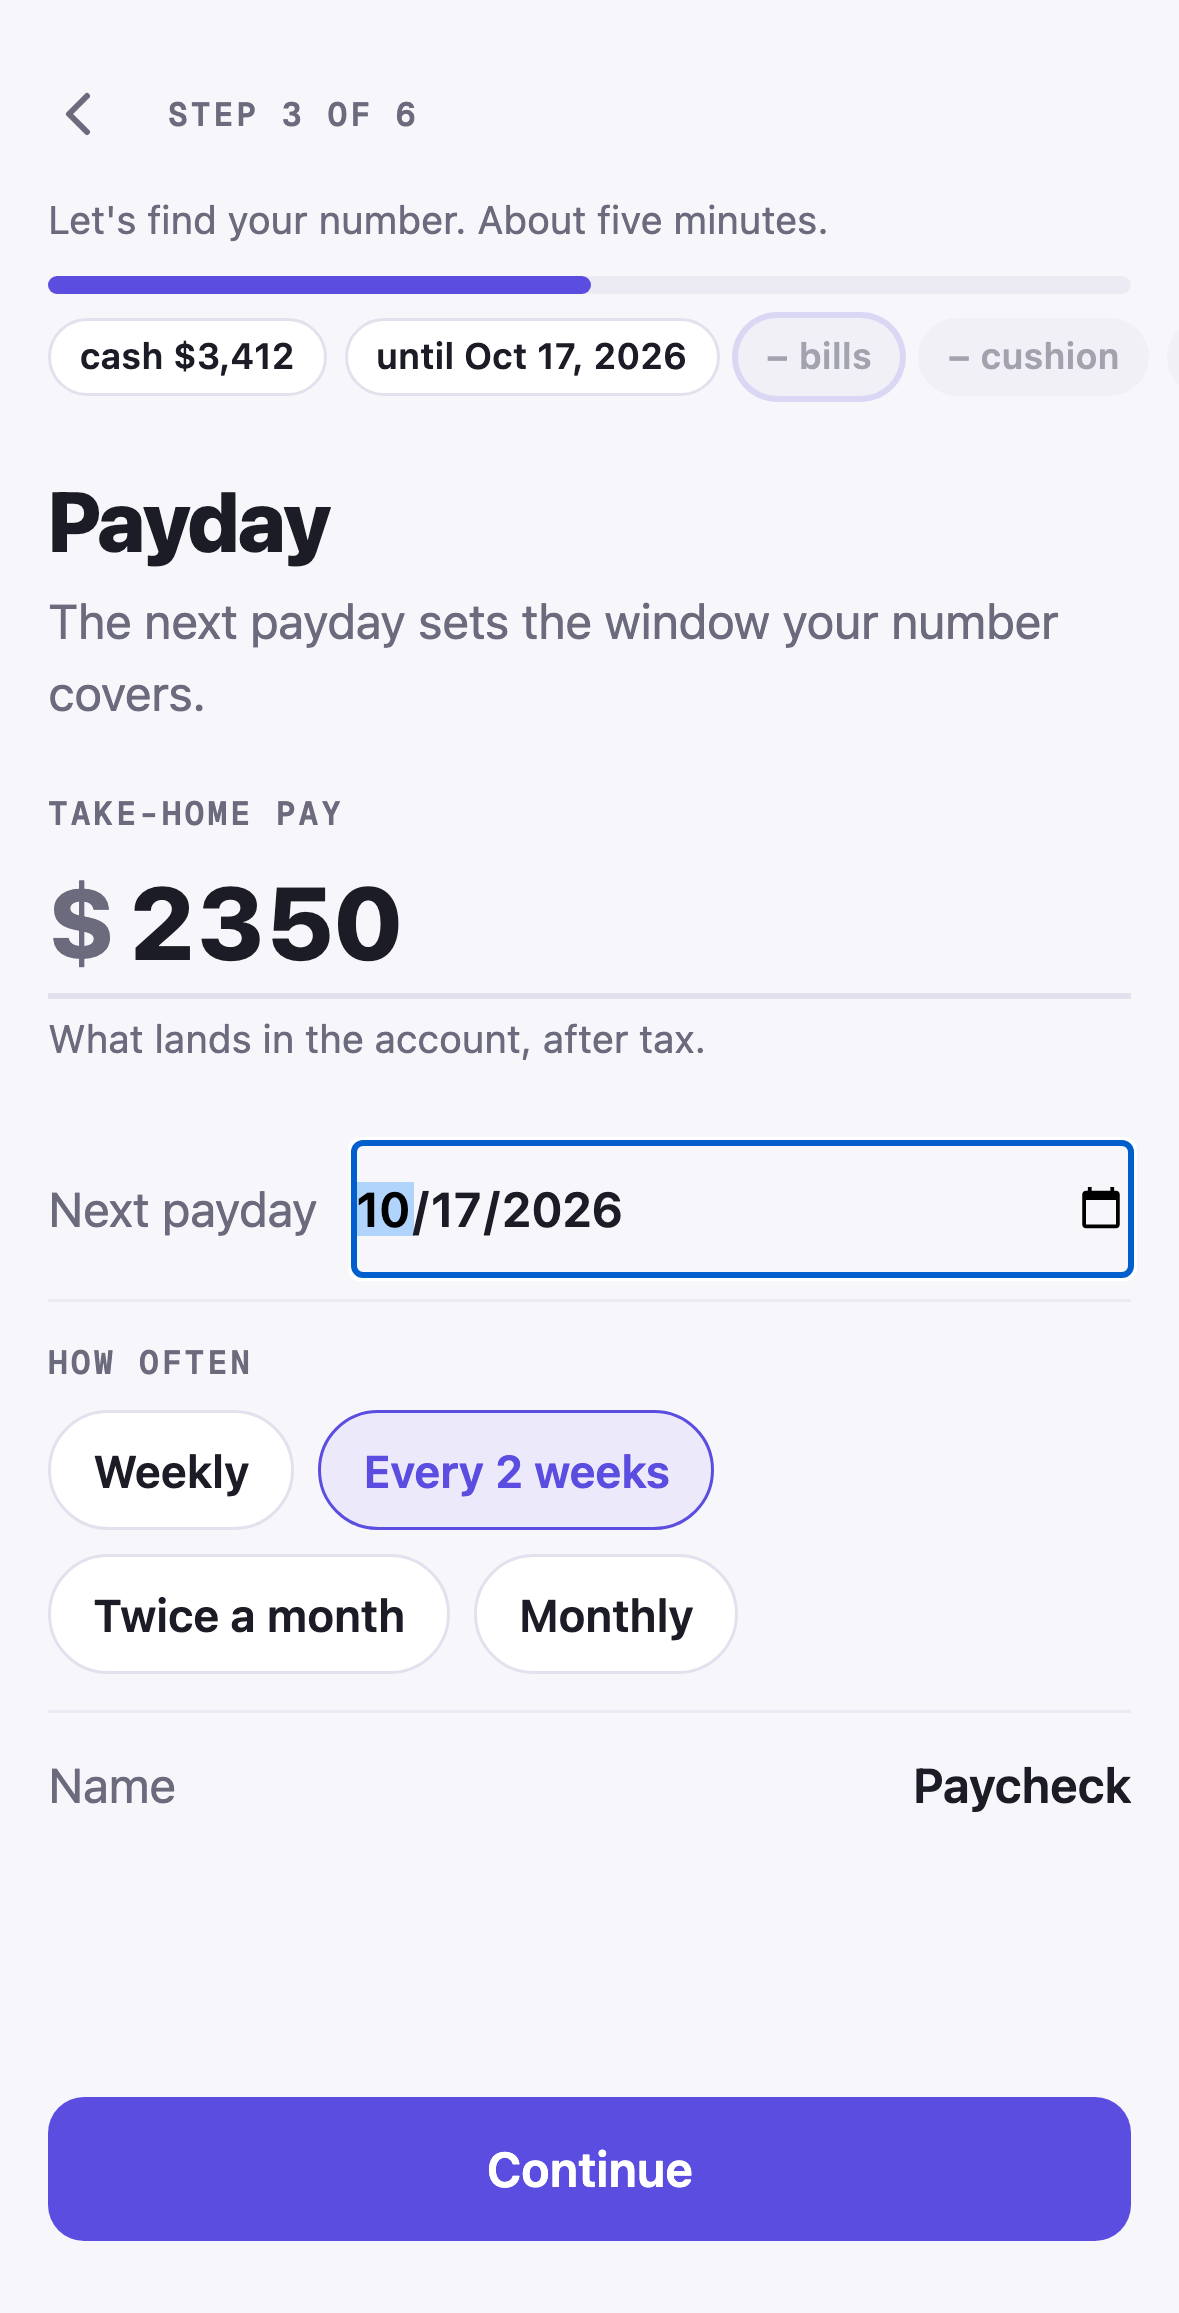
Section titled “Step 3: Payday”Enter your take-home pay (what lands in the account, after tax), pick the next payday as a full date from the date picker, and choose how often: Weekly, Every 2 weeks, Twice a month, or Monthly. The next payday sets the window your number covers. More paychecks, and irregular income, are added later under Income; see Paydays and income schedules.
Step 4: What’s due before payday?
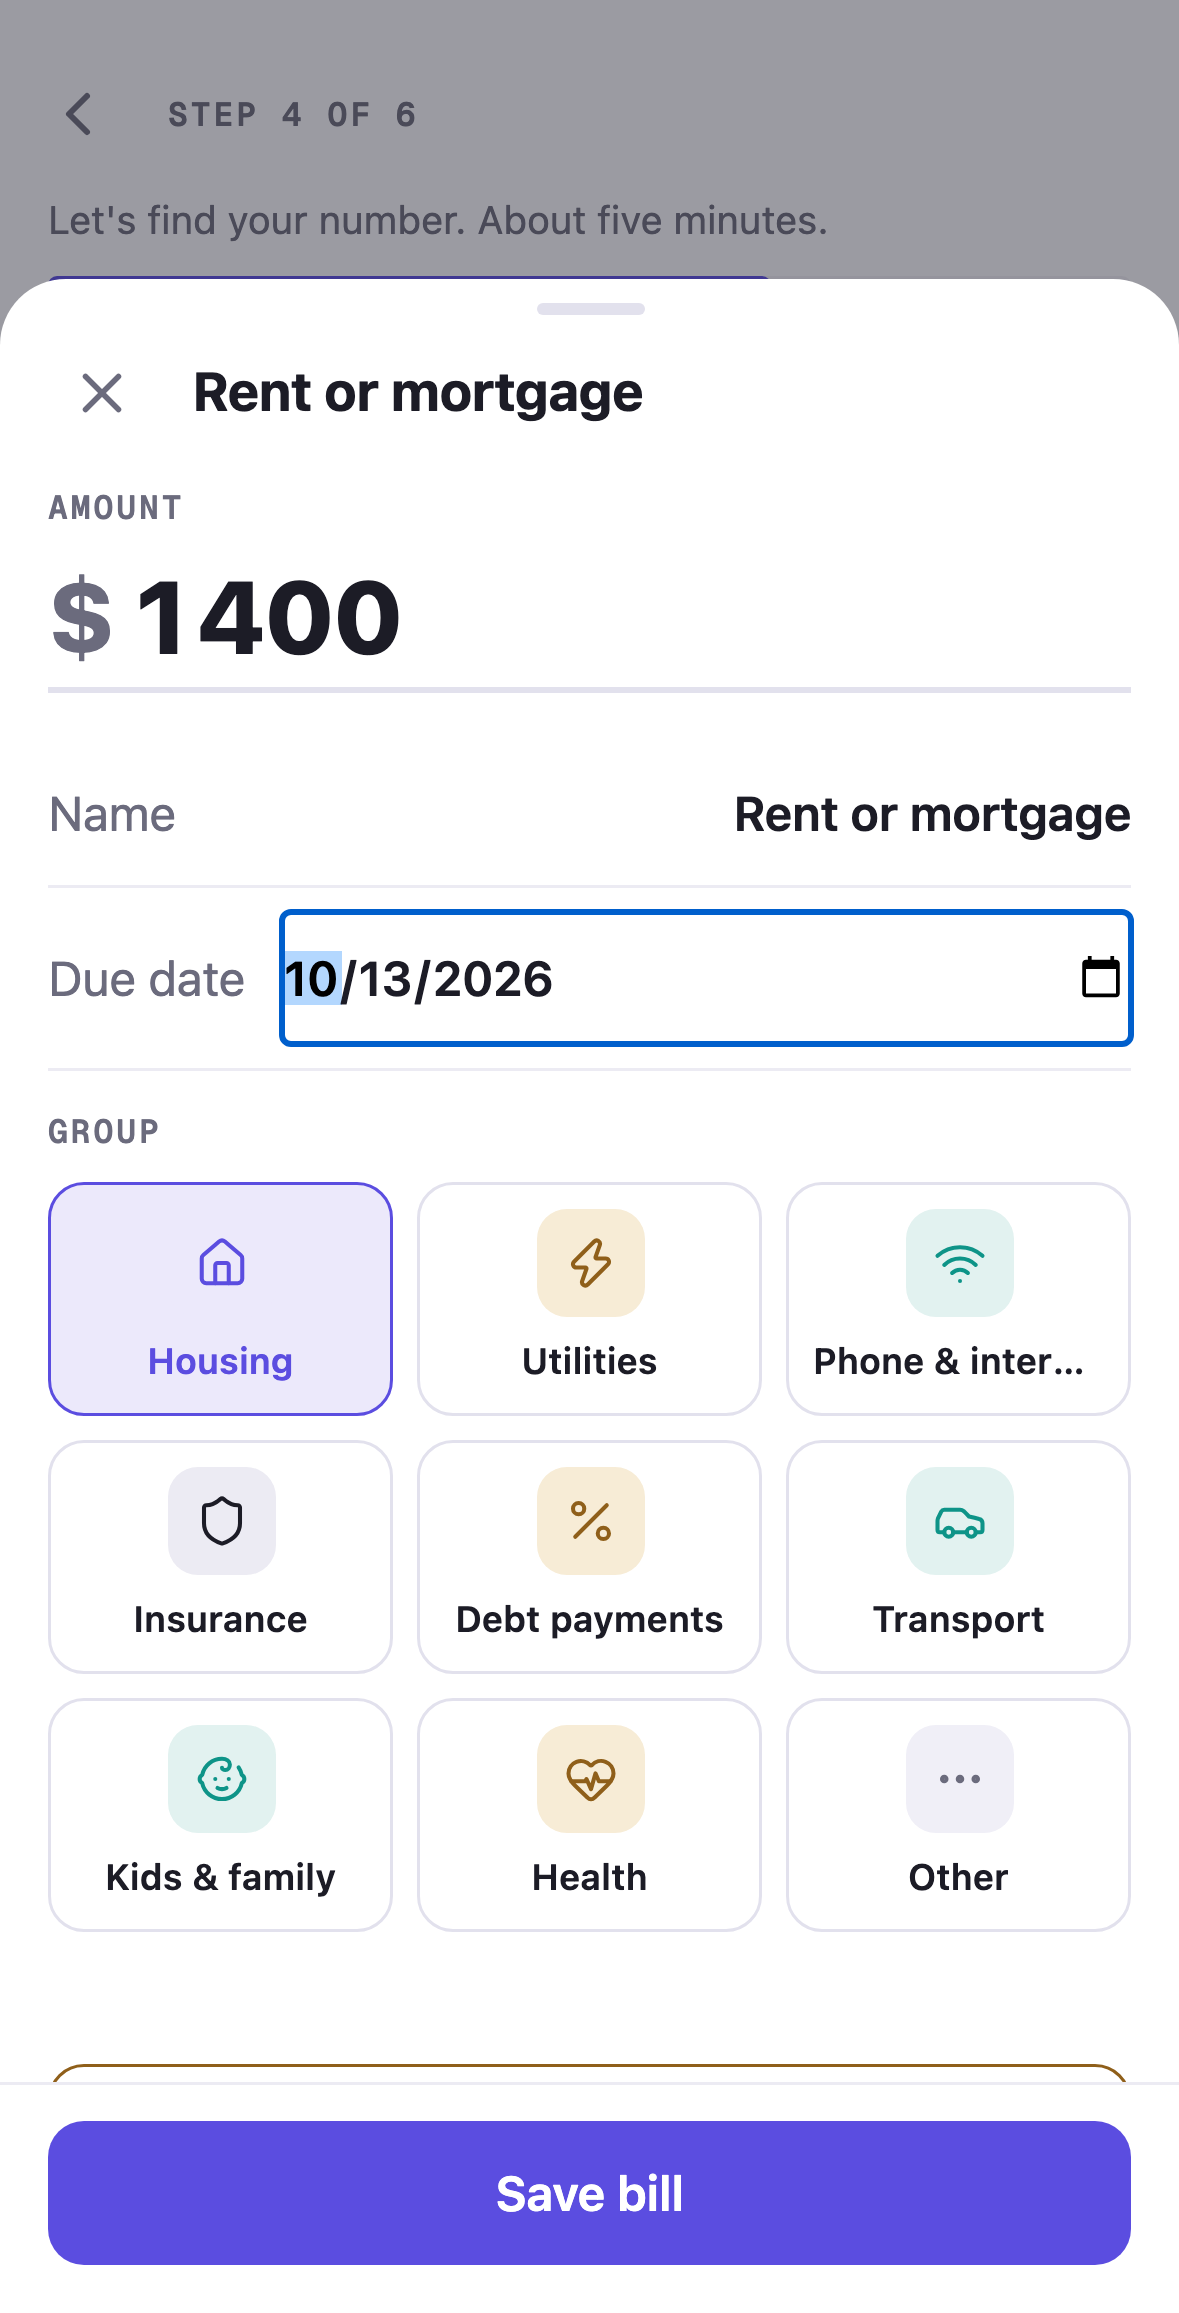
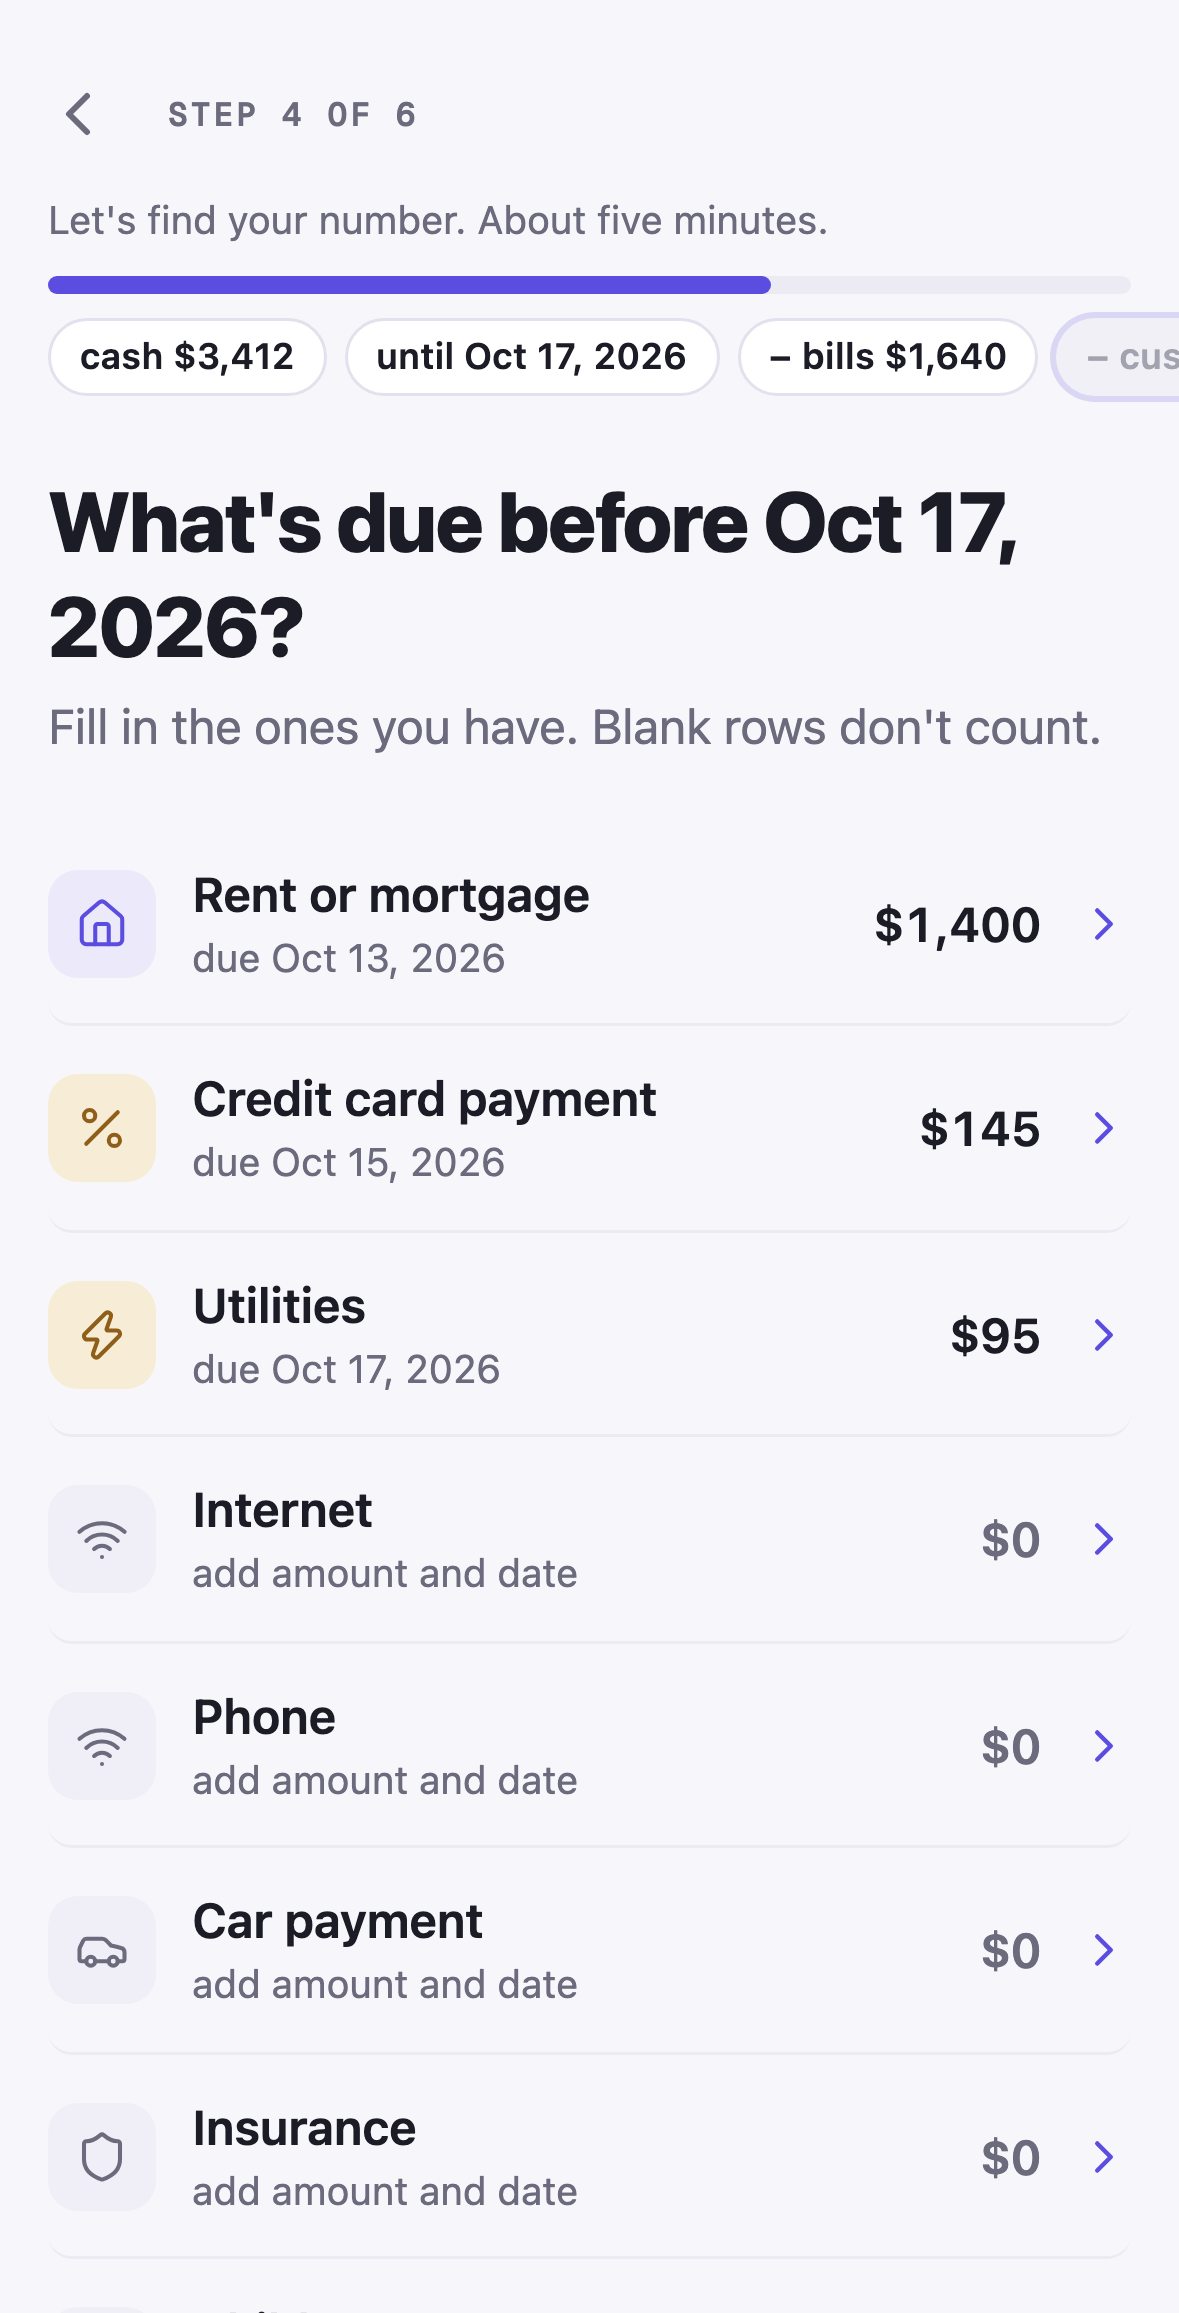
Section titled “Step 4: What’s due before payday?”The common bills are listed as rows: rent or mortgage, a credit card payment, utilities, internet, phone, a car payment, insurance, childcare, a student loan. Tap a row to open its sheet and give it an amount and a due date; a row left blank does not count. Enter each bill once: these rows repeat monthly on their own, and the caption says so (repeats monthly · due Nov 1, 2026). Add a different bill adds one that is not on the list. Each bill carries a group (Housing, Utilities, and so on) for the Budget later.
Nothing due before payday? Tick No bills before payday and Continue opens.
Step 5: Your cushion
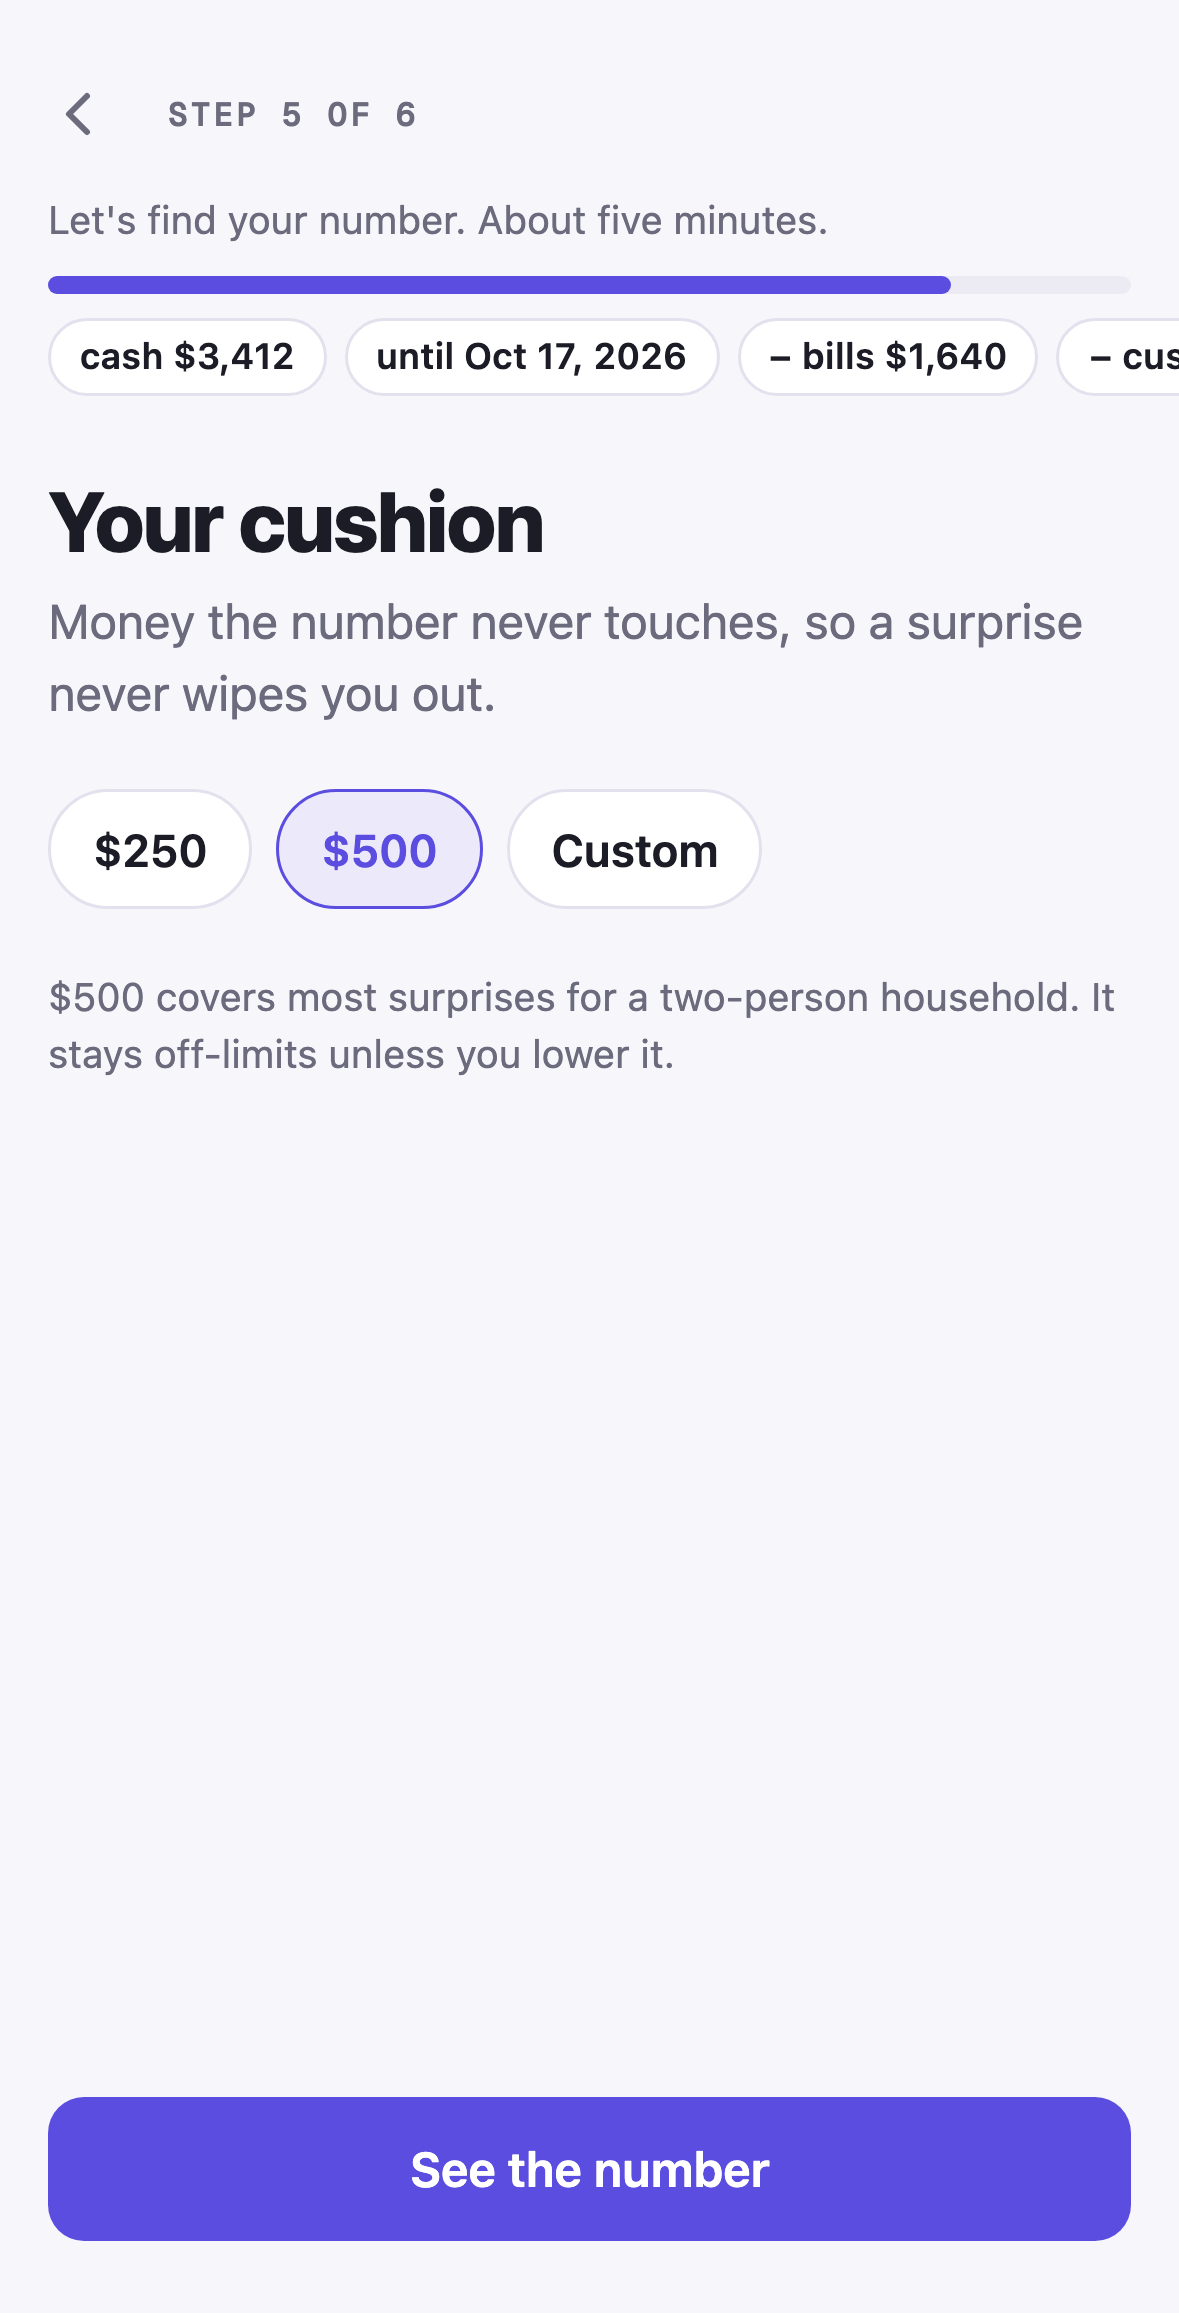
Section titled “Step 5: Your cushion”Your cushion is money the number never touches, so a surprise never wipes you out. Choose $250, $500, or Custom and type your own. $500 covers most surprises for a two-person household, and it stays off-limits unless you lower it. Tap See the number.
Step 6: That’s your number
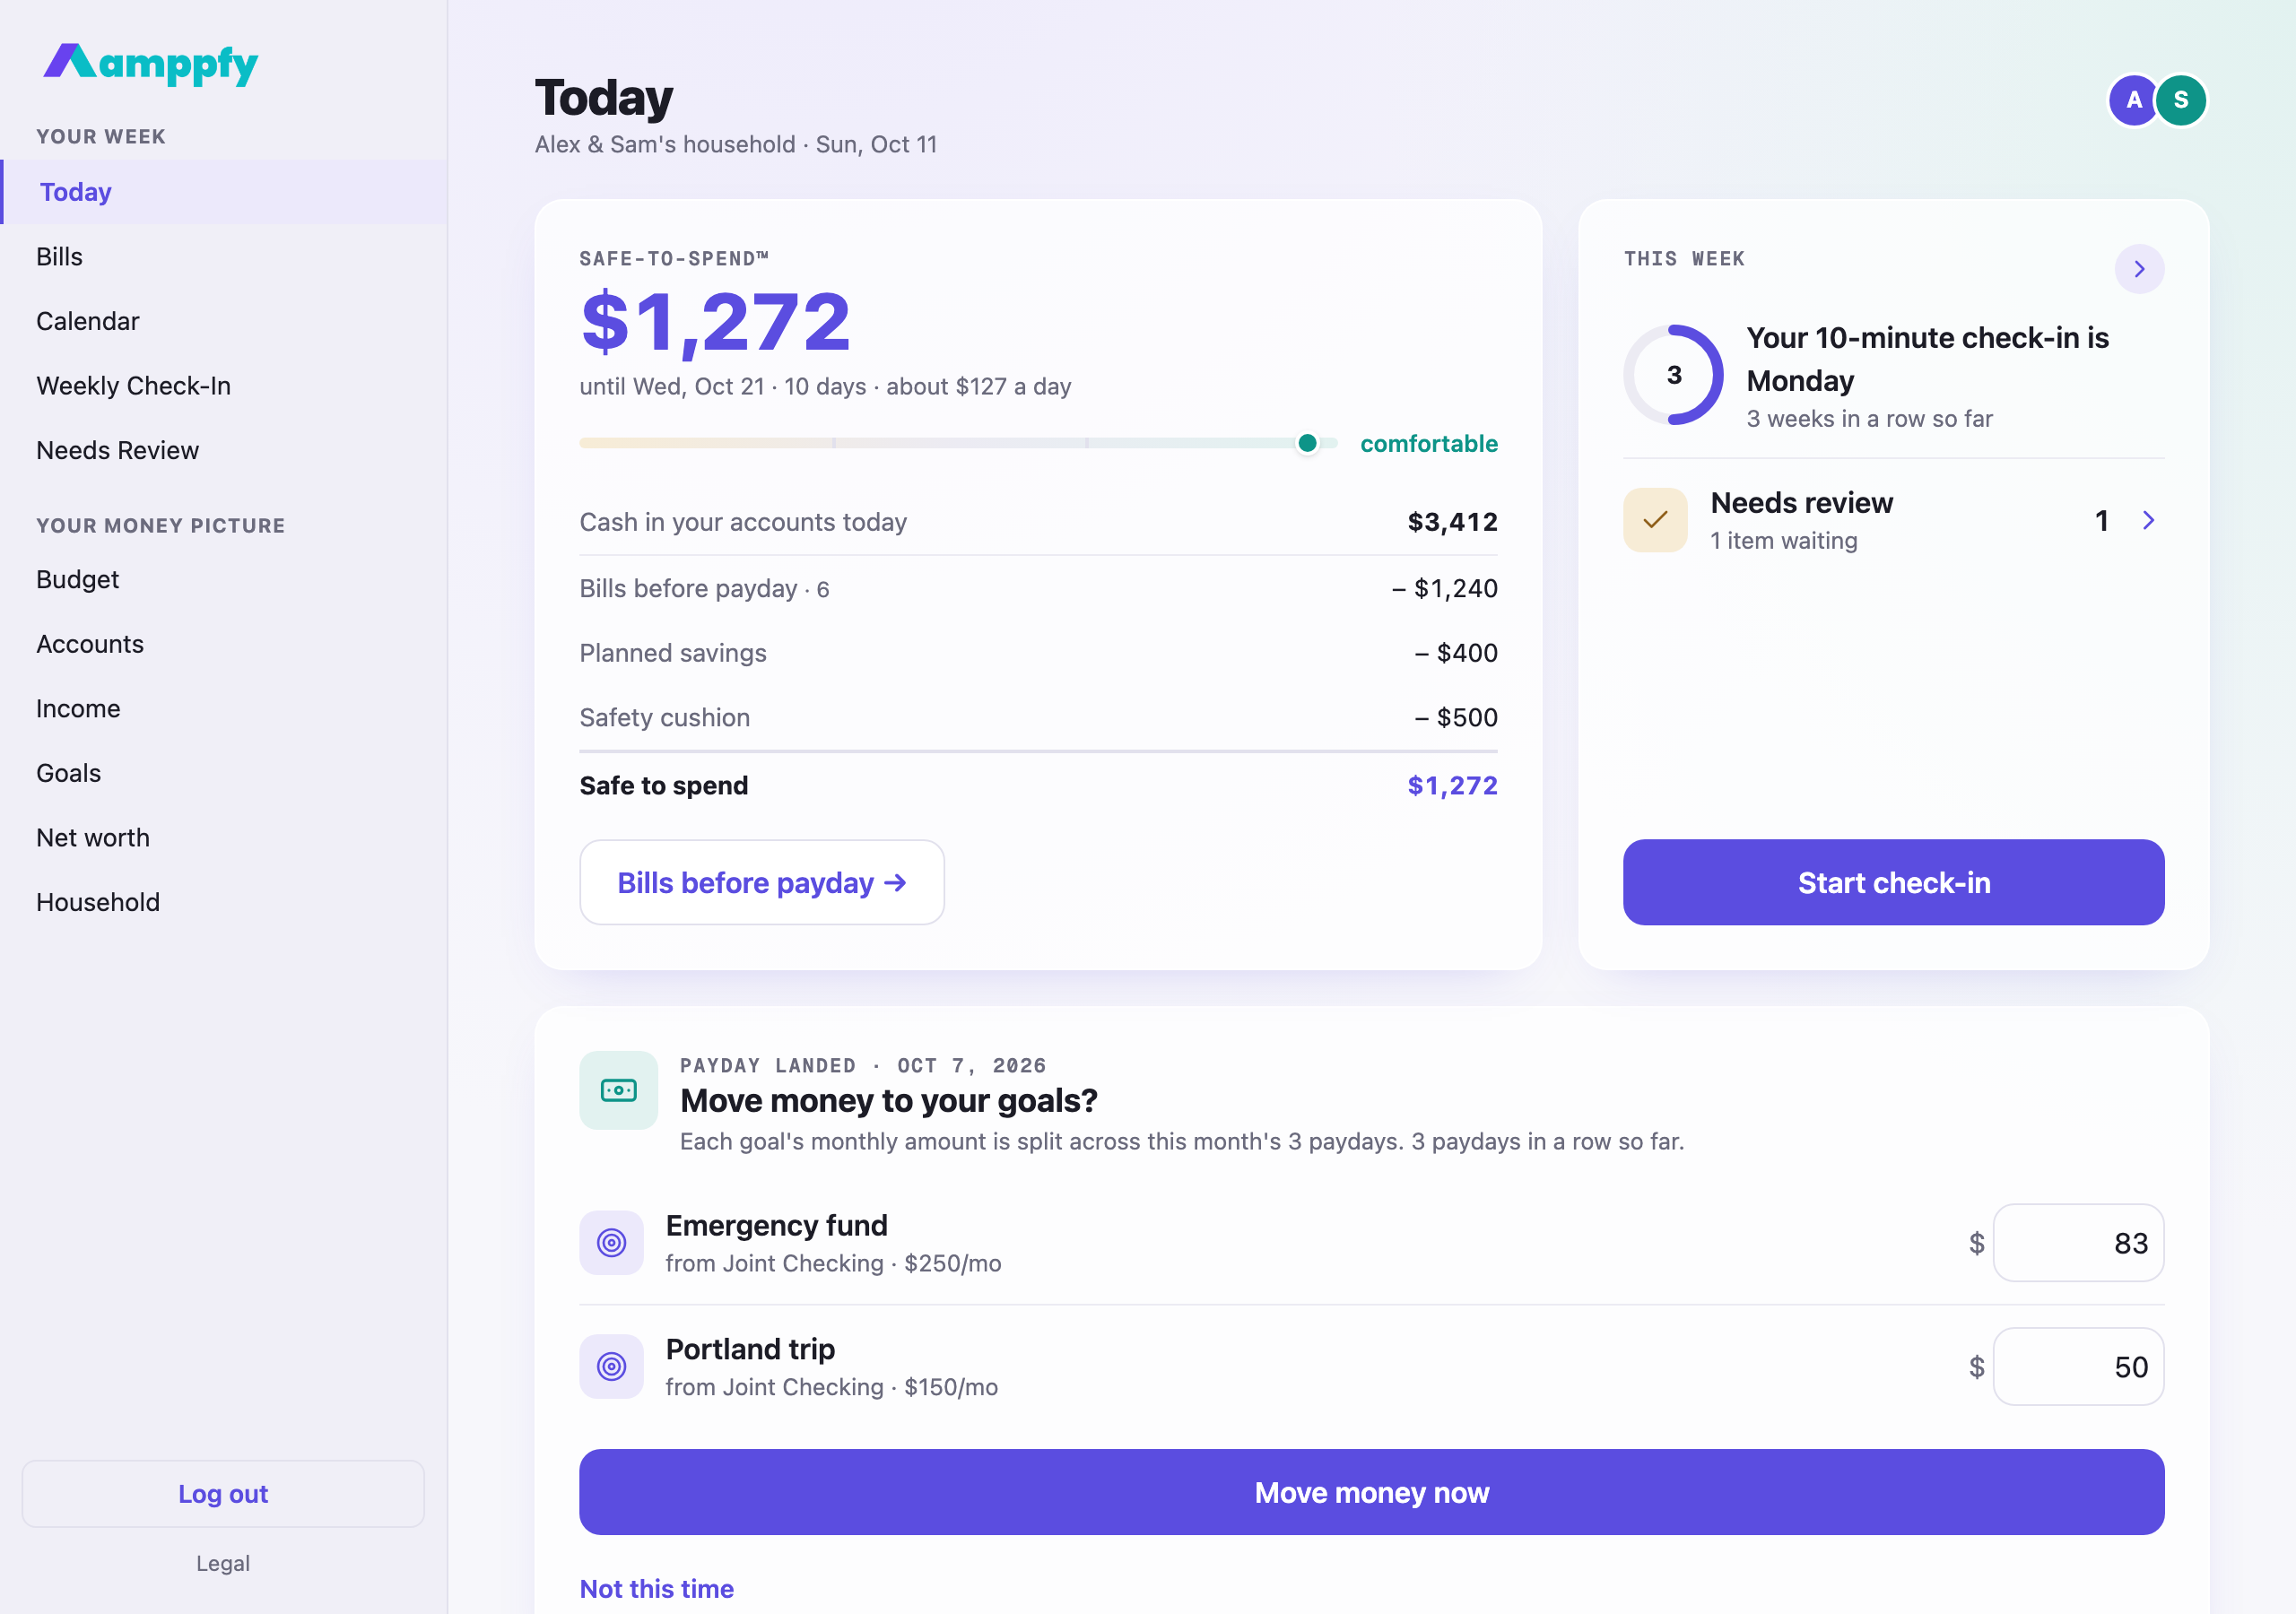
Section titled “Step 6: That’s your number”The reveal is the same card you will see on Today: your Safe-to-Spend™ number counting up, the line under it (until Oct 21, 2026 · 10 days · about $127 a day), the status scale, and the receipt: cash in your accounts, minus bills before payday, minus the cushion. Each receipt row has an Edit link back to its step. Tap Go to Today and everything is saved.
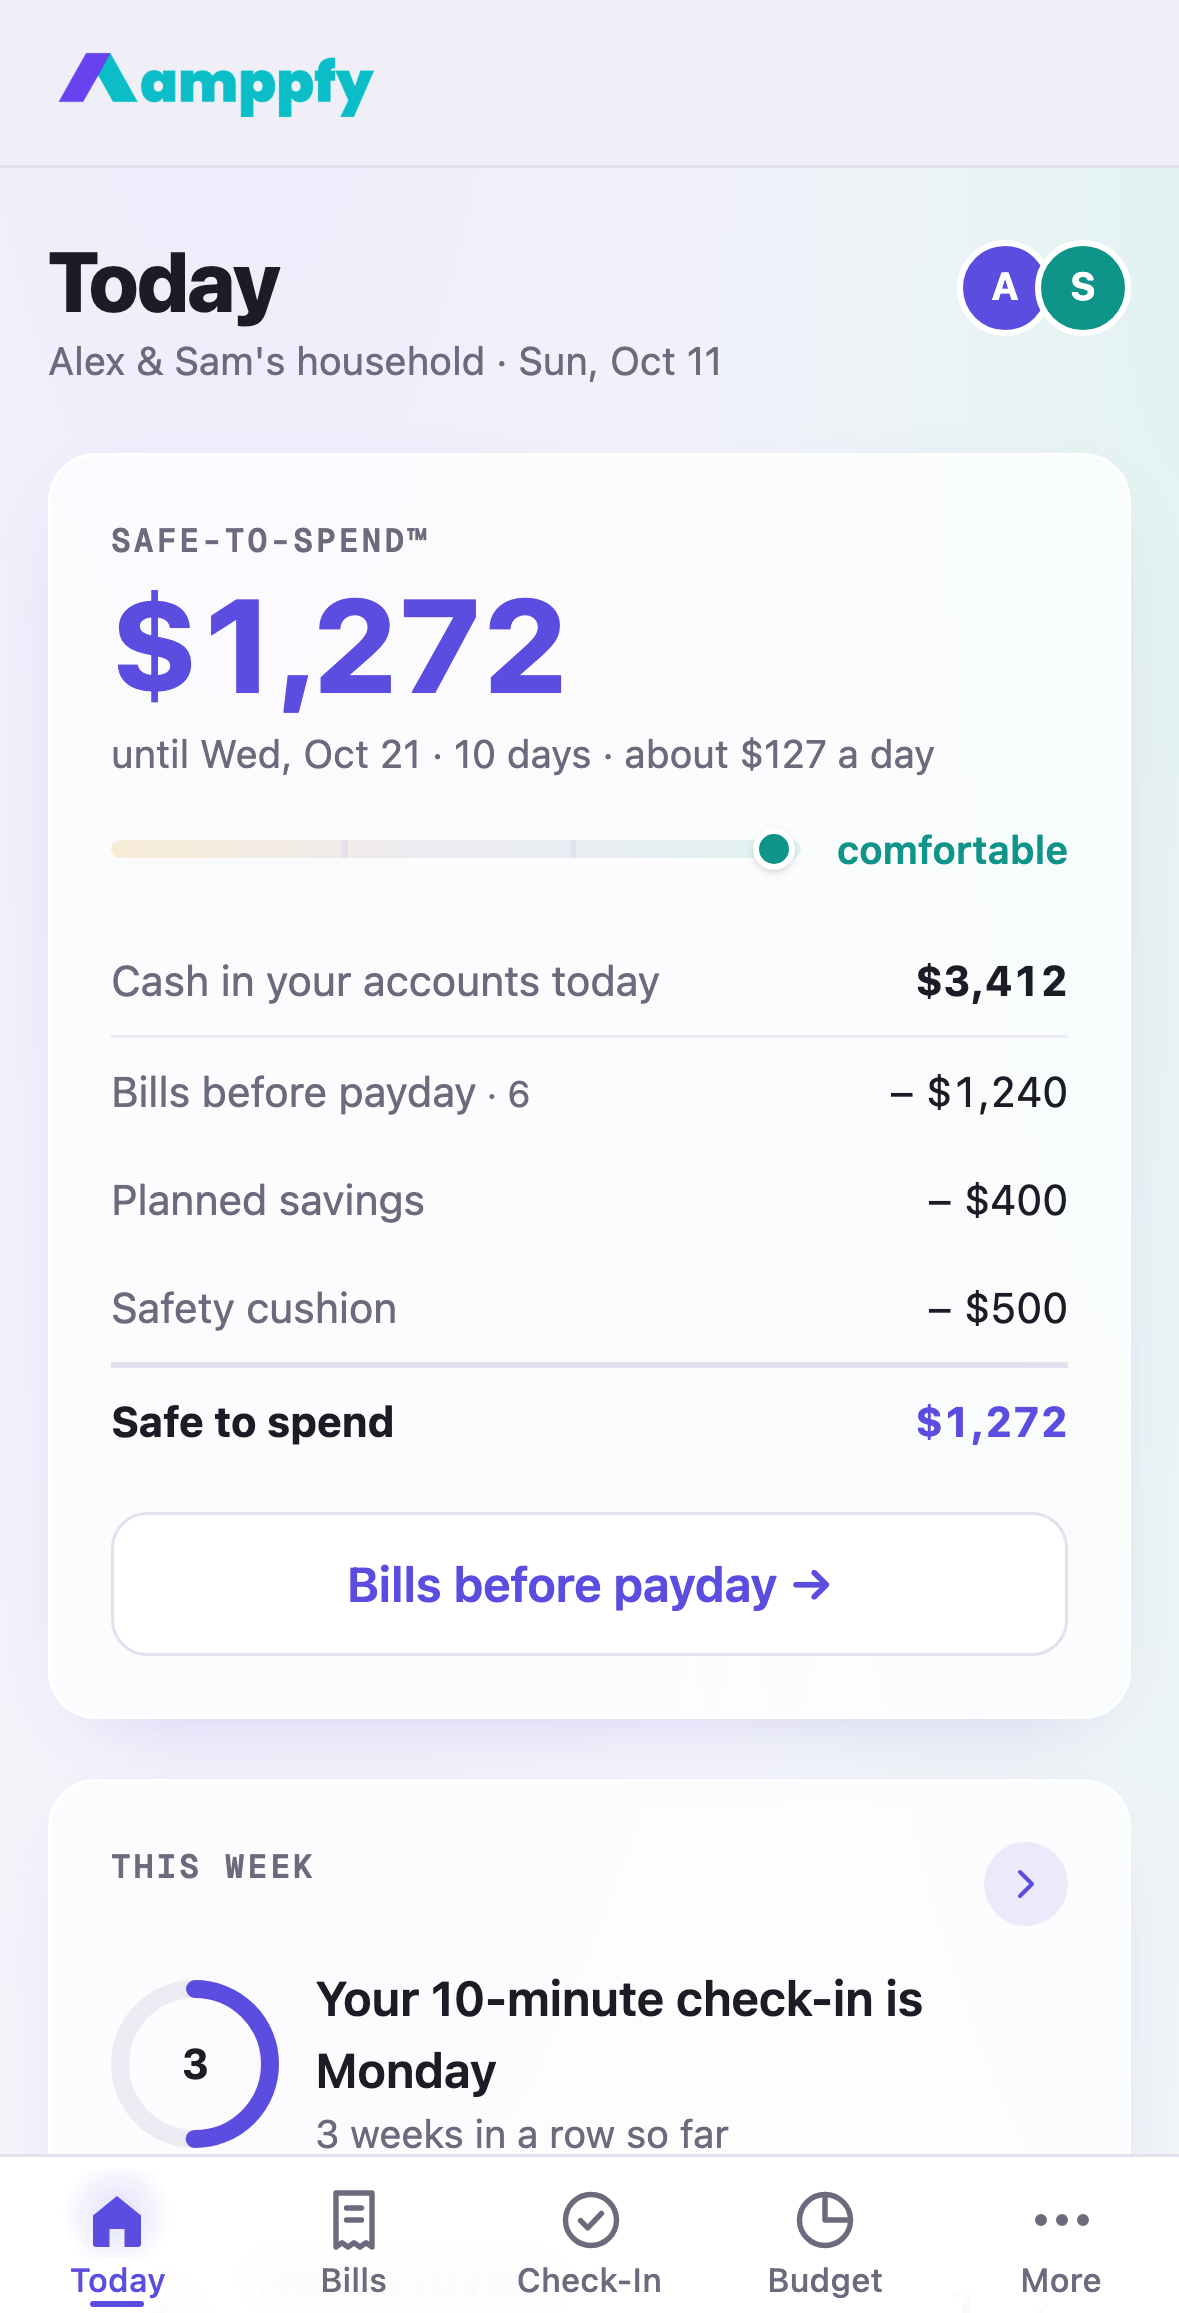
Under Go to Today, Do your first check-in now goes straight into the check-in: with fresh balances and the bills you just entered, the first one takes about three minutes and starts your streak.
Two short moments after the reveal
Section titled “Two short moments after the reveal”Pick your check-in day. One tap on a chip: Sunday evening, Monday morning, Wednesday evening, Friday payday, or Saturday morning. Amppfy suggests the first slot after your payday (a Friday payday suggests Friday payday; a Wednesday payday suggests Friday payday; a Saturday payday suggests Sunday evening), so the check-in lands right after pay and before the bills. Evening slots remind you at 6pm, morning slots at 8am; change either any time under Household.
On iPhone the same screen shows the reminder you will get, Check-in day · Ten minutes keeps your number honest. 4 bills to confirm., and the button reads Remind me Monday. Tap it and your phone asks once for permission. Not now keeps the reminder by email instead; so does turning notifications off later. Either way the reminder arrives.
One number for the two of you. If you chose With a partner or My household, the next screen offers Share invite, which opens your share sheet with a ready message and a link that works for 7 days. Later goes straight to Today; the invite waits under Household. See Invite your partner.
Here is how to read the number. On the web, the same Today screen looks like this:
After setup
Section titled “After setup”Your household gets a name from your first name (“Alex’s household”); rename it under Household. Savings goals are not part of setup: start one whenever you are ready from Goals, and it sets its monthly amount aside first, like a bill. See Goals.